
The Boys Bathroom: Room Reveal
This post has been a looooong time coming! For those of you who have followed me since the creation of this blog, you have probably heard me talk about our Boys Bathroom reno before, or have seen a few sneak peaks of my progress on Instagram. The major part of the reno was actually done about a year ago, but I've been fussing and changing up the decor like a crazy person trying to get it just right. (Seriously...I've bought 4 shower curtains. 4 people. I have issues. I know.) The long wait has paid off I'm proud to finally be able to share it with you!
To refresh your memory, or if you are new here and have no idea what I'm talking about, lets take a trip back down memory lane to *cough, cough* February 2012.(Gah!! Has it been that long?! Insert head hung in shame.) When I started planning the room makeover, I wanted to created a fun space for my boys, but since this bathroom is shared with our frequent house guests, I also wanted it to have a more sophisticated feel. Here's the original mood board for inspiration in this space:
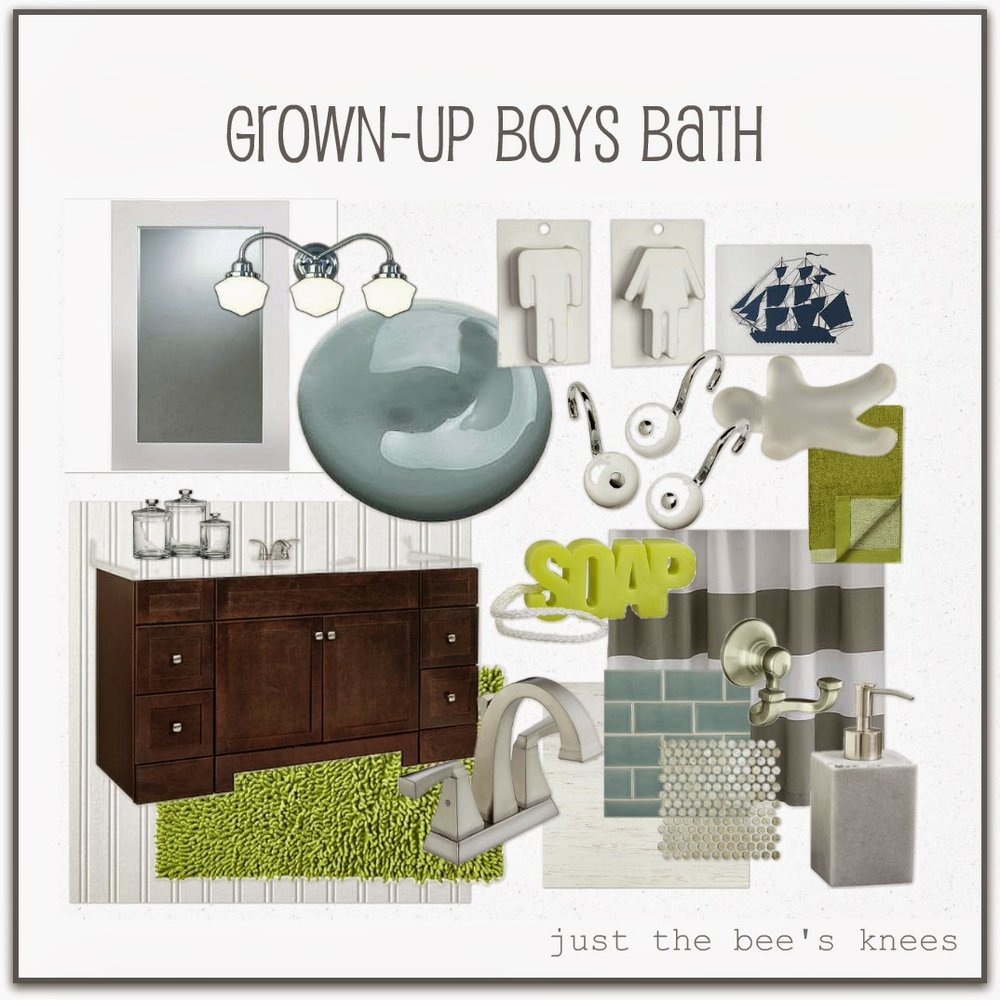
I strayed a little bit from the original plan and didn't add any green accents. We also decided bead board wasn't the best choice, so I decided to do a different wall treatment instead. (Which you will see in a minute!) Heres the before picture again. Boring, outdated white builder basic bathroom.

And now......
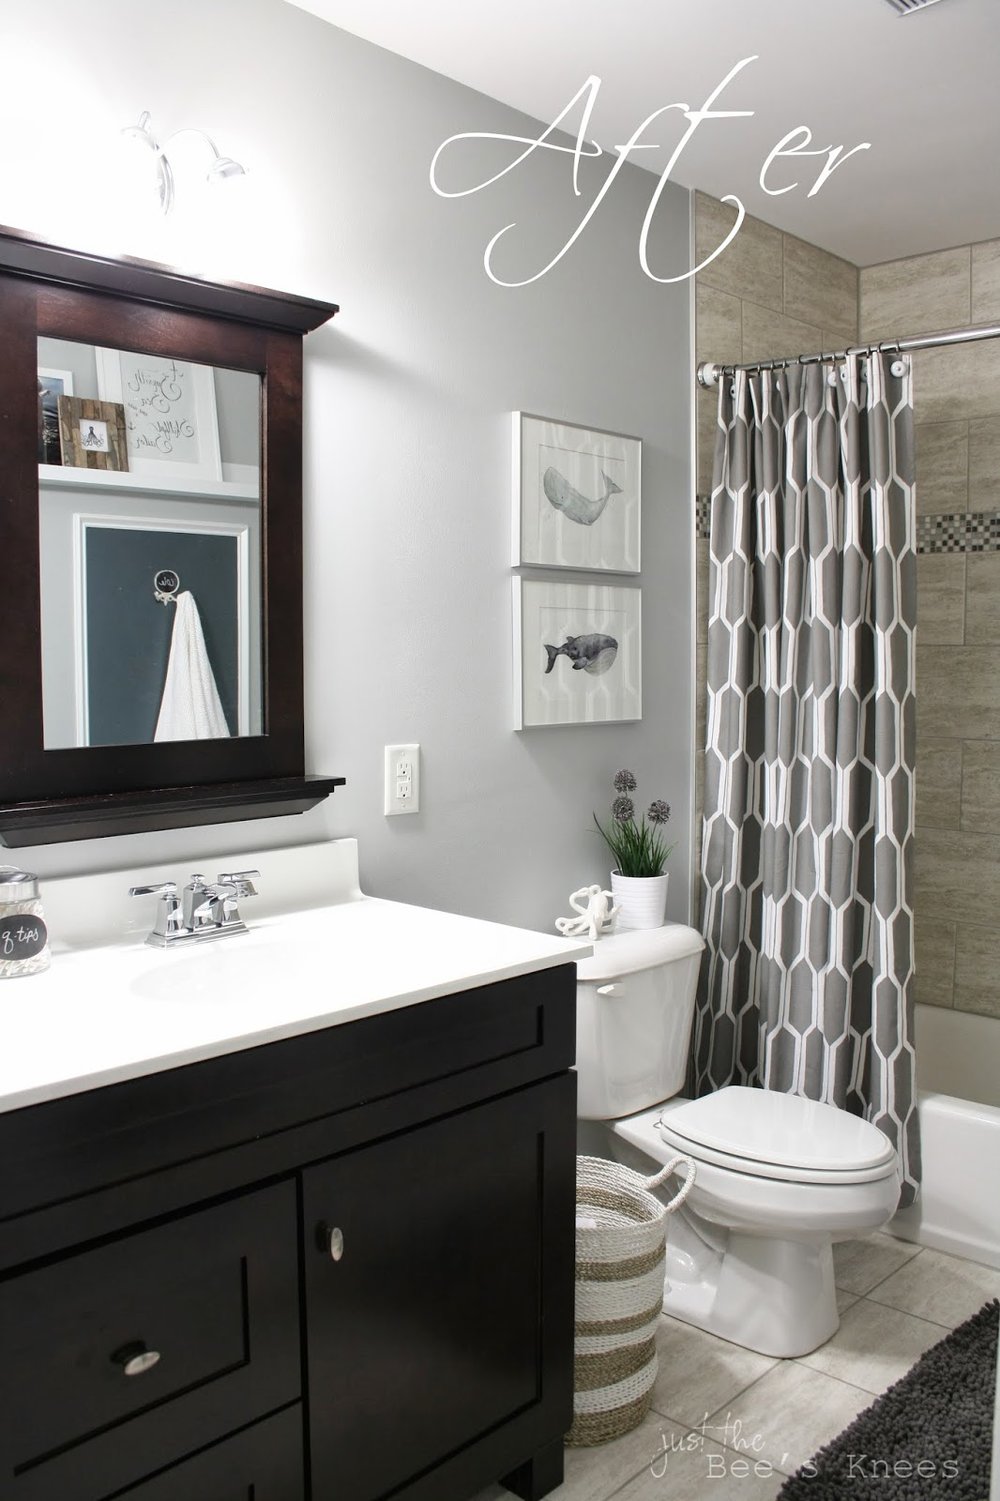
....anything BUT boring.


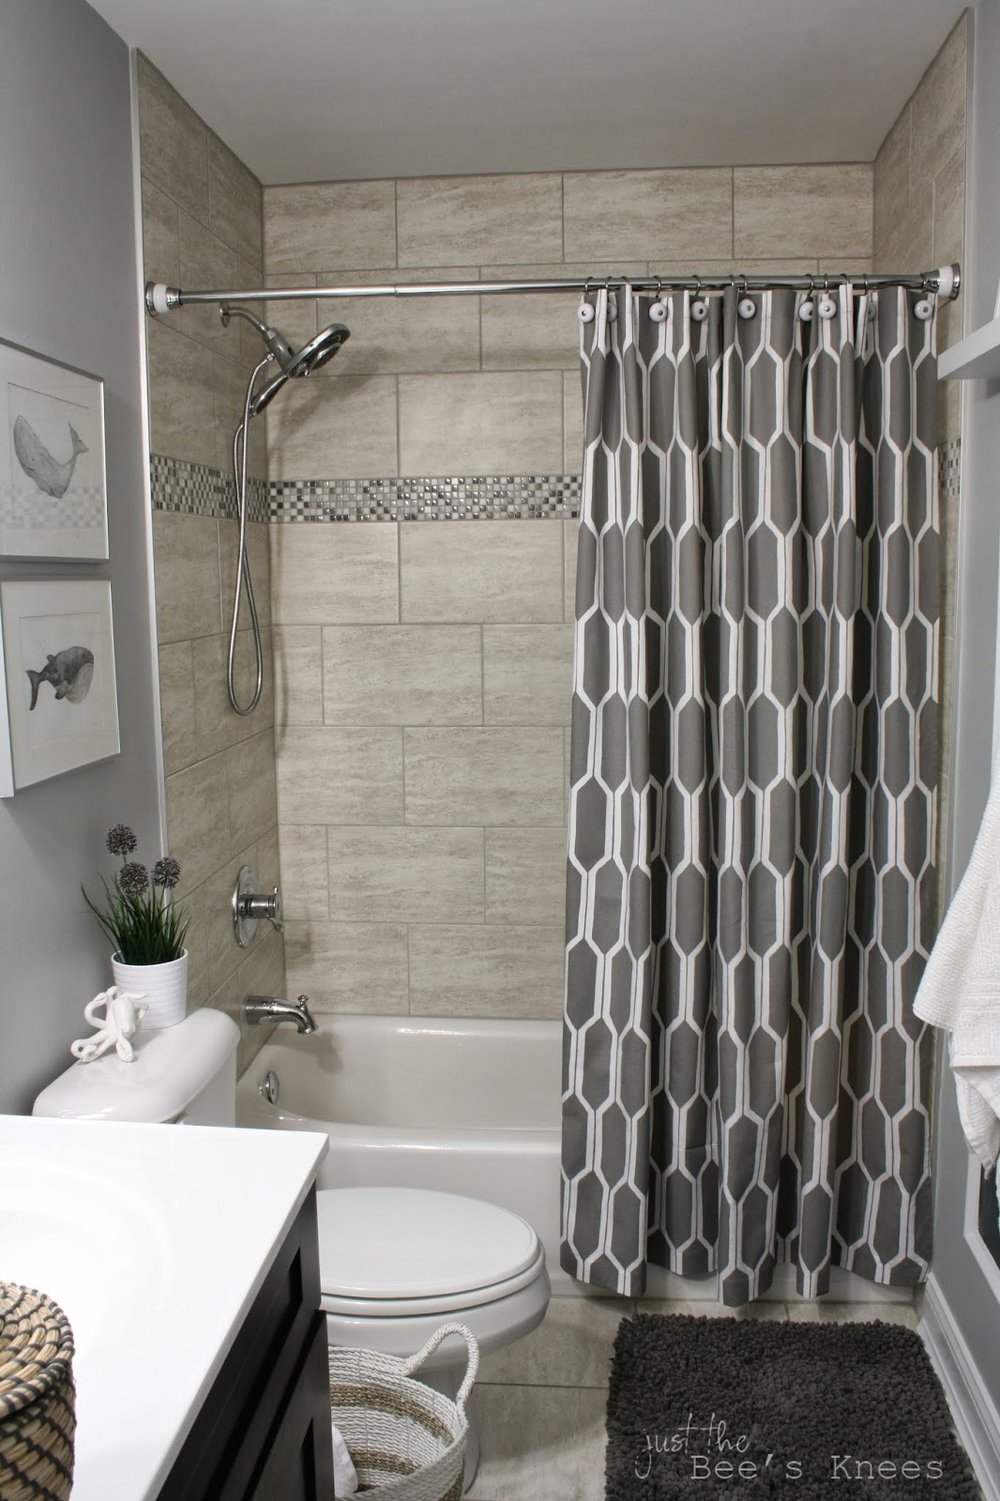
We decided to replace the vanity as the original white one had too much water damage to be saved. We purchased this free-standing Allen + Roth double vanity from Lowes, but salvaged the original white Corian top to save money. It was still in great shape and fit the vanity perfectly. I love how the vanity looks more like a piece of furniture than a bathroom cabinet.
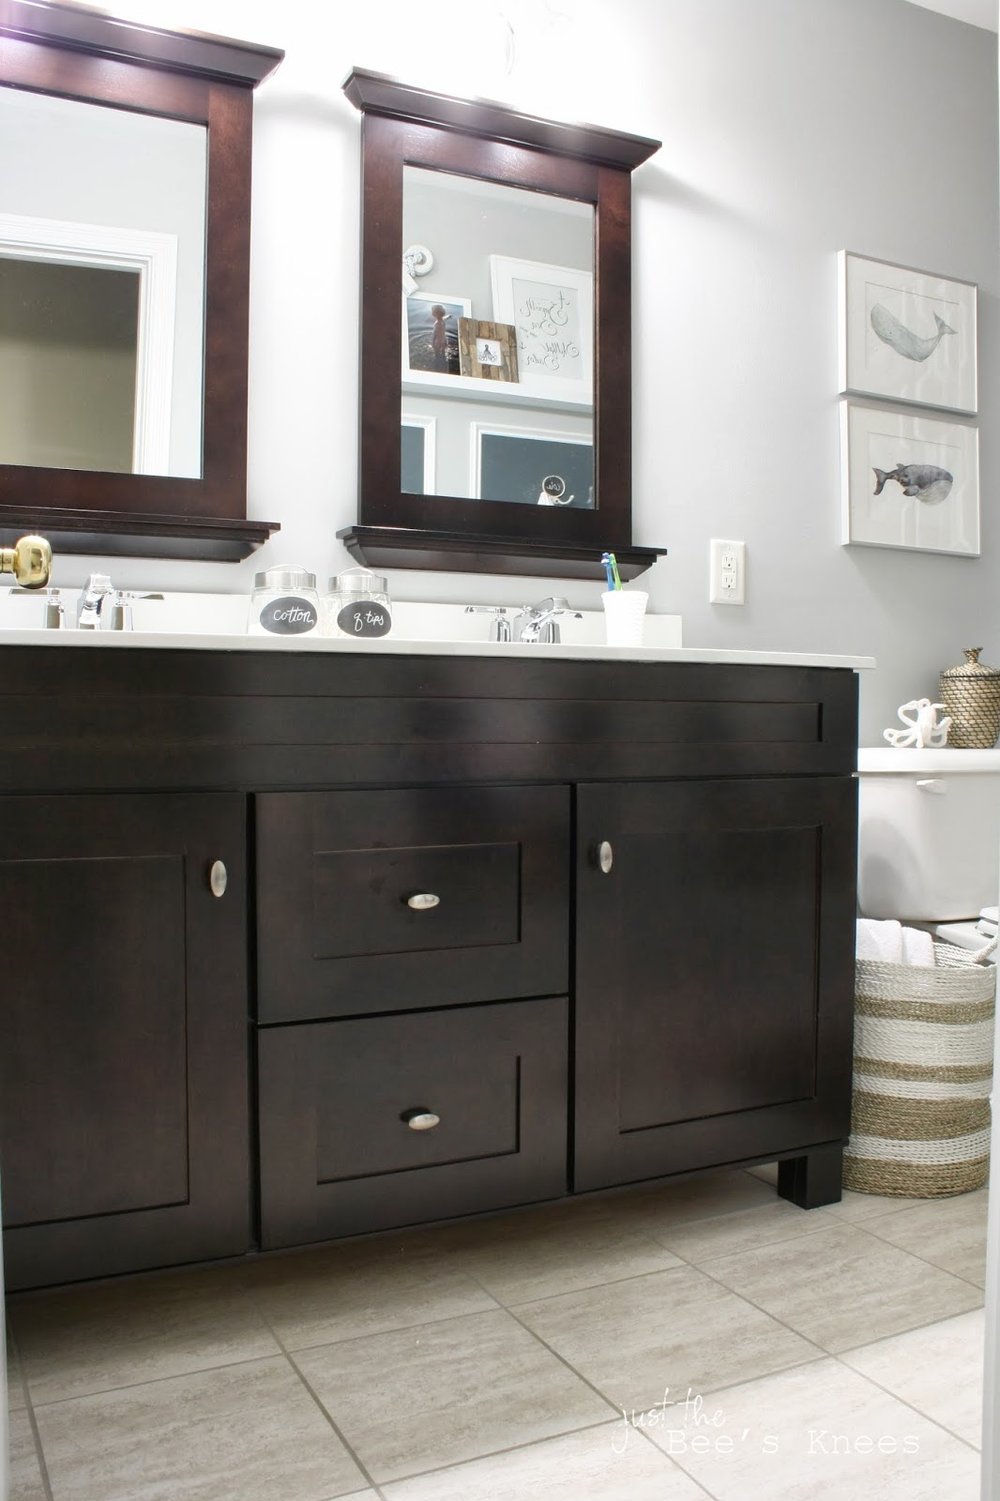
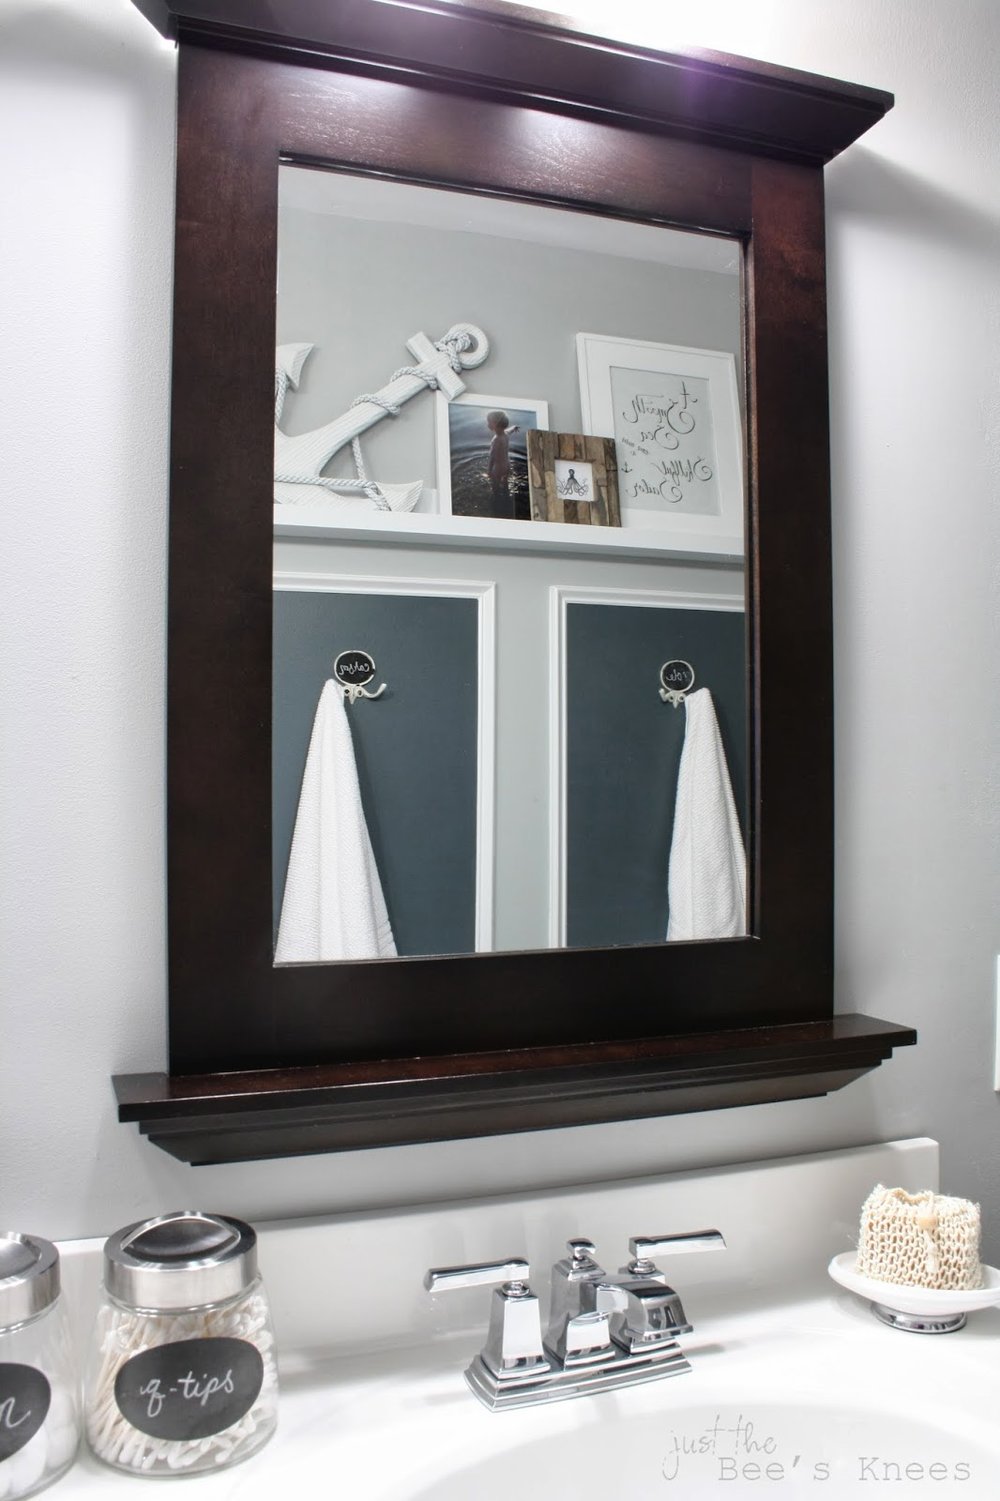
We also removed the medicine cabinet and hung a simple Towel Ring in its place. The one large mirror was also removed and replaced with 2 of these mirrors, also from Lowes, that complimented the vanity. The old faucets were leaky and in need of repair, so we replaced them with these from Moen . I'm obsessed with the squareness of them! So pretty.

The tile we chose was Classico Ivory, Matte from the Tile shop. We laid the 12x12 on the floor, and the 10x16 on the wall, subway style. We also accented the shower tile with a band of glass mosaics that we bought from a store that went out of business, so unfortunately I don't have the exact source.
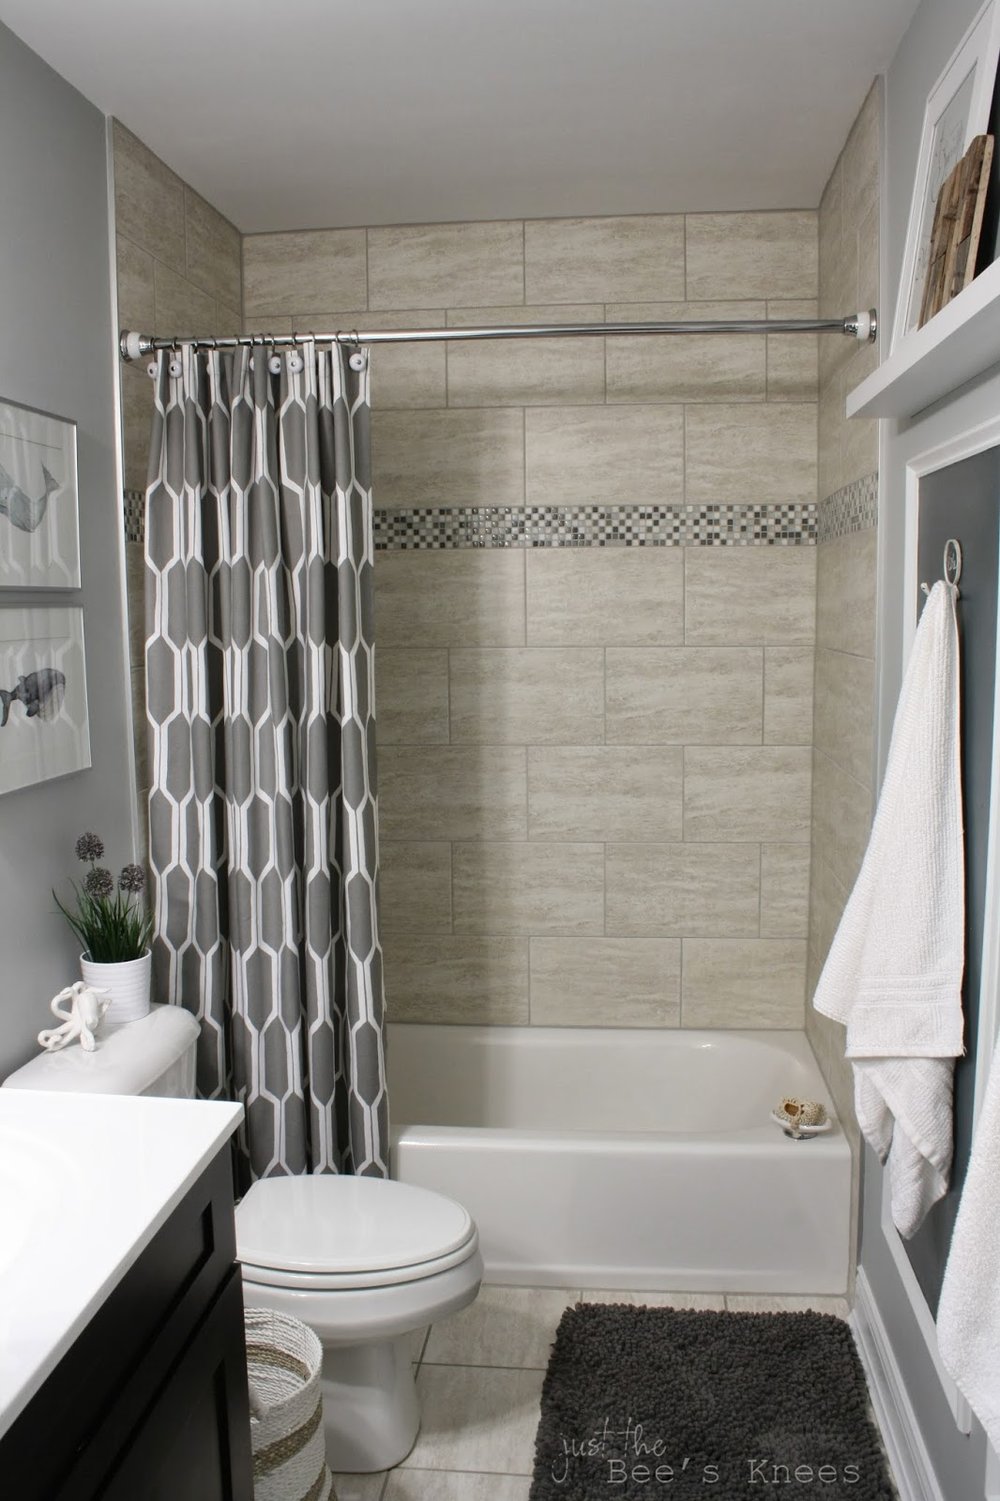
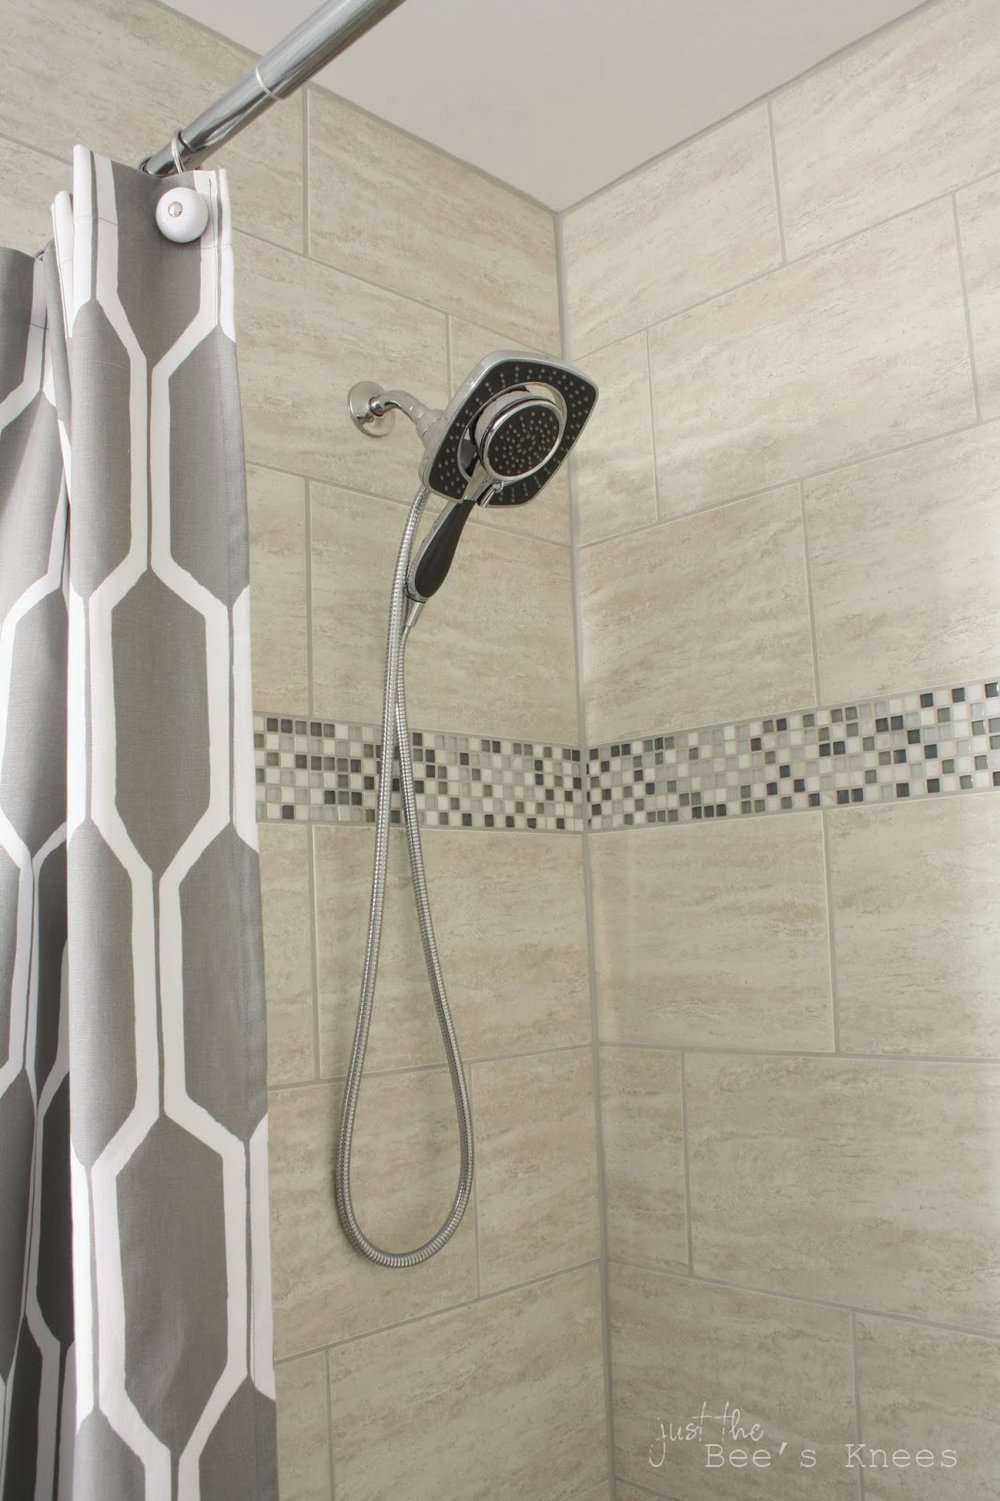
The original bathtub was scratched and rusted, so we replaced it with a standard enamel tub. I also really wanted a shower head with a detachable arm to make it easier to wash the boys, so we went with this Delta Two-In-One Shower Arm in Chrome. The squareness of the shower head co-ordinates really well with the faucets, and I also like how similar it is to a rain shower head.
Shower curtain #4 proved to be a winner and I snagged it on clearance from West Elm for only $16 after a coupon. I'm loving the honeycomb pattern against all the other square-ness going on in the room. (Is that even a word?!)
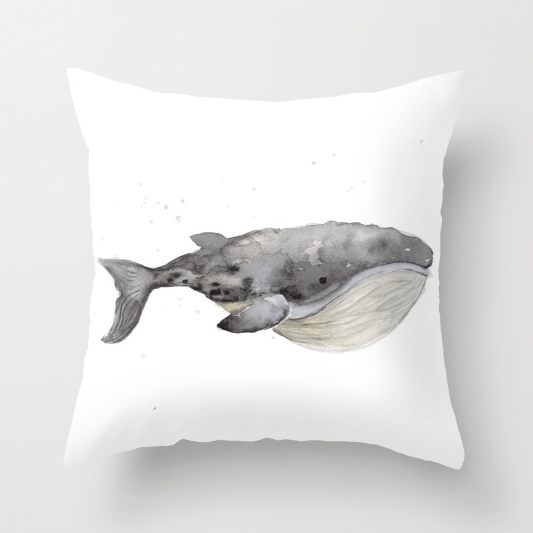
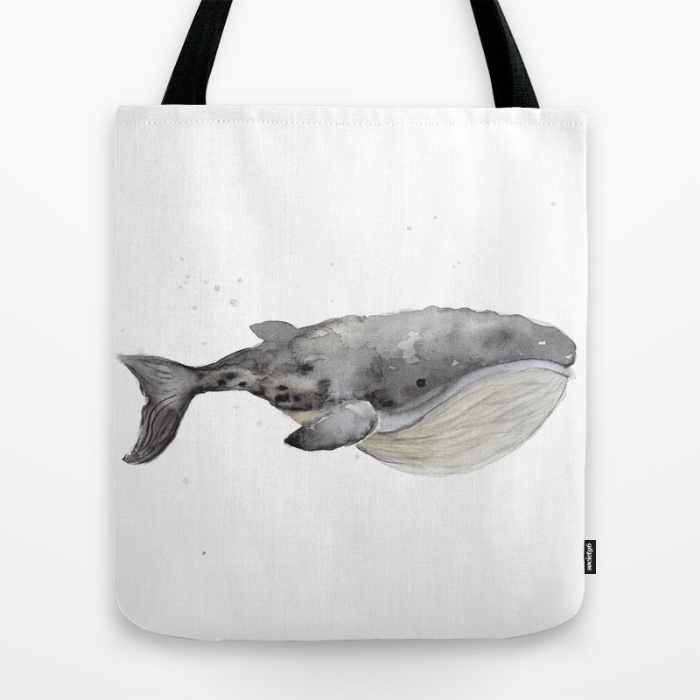
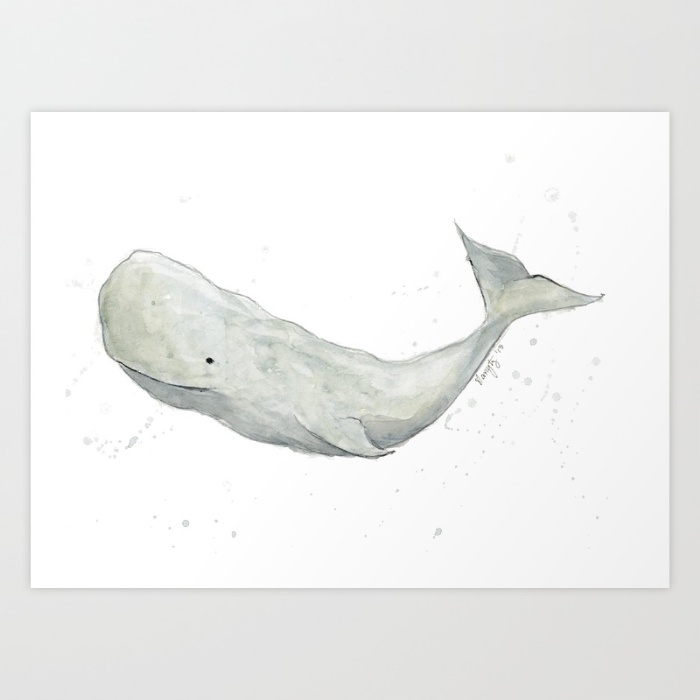
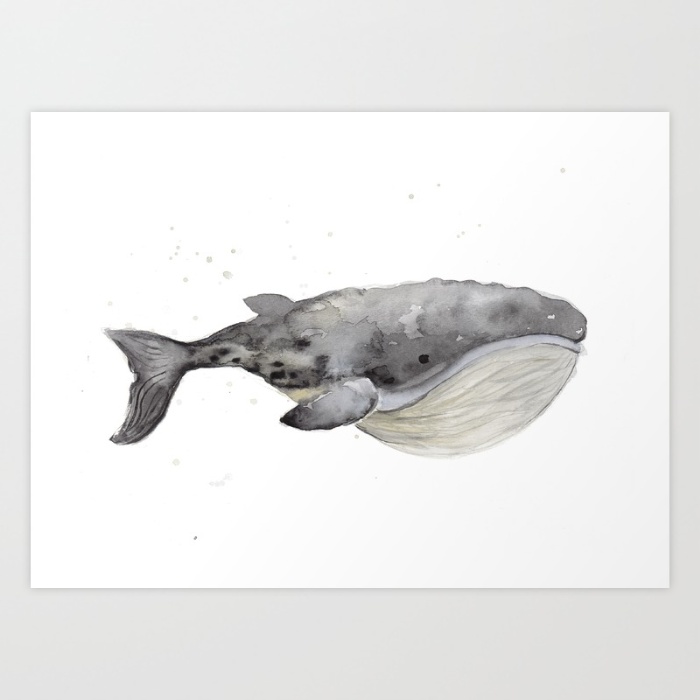
The Boys wanted a Nautical theme with whales, but since I'm not so big into "themes" I tried to incorporate elements that would make them happy and still be sophisticated enough for guests. If you follow me on Instagram, you would have gotten a glimpse at the watercolor whales I painted for this space.
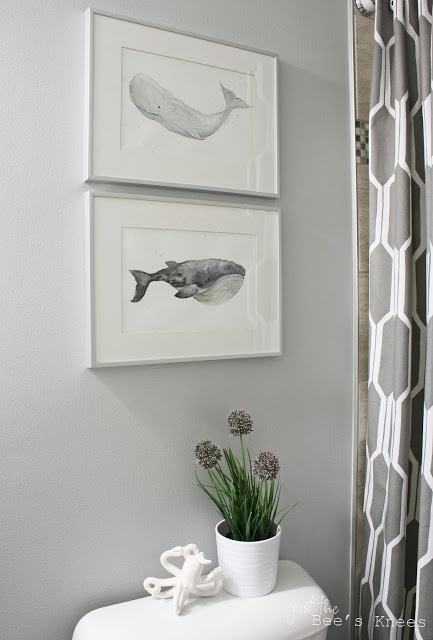
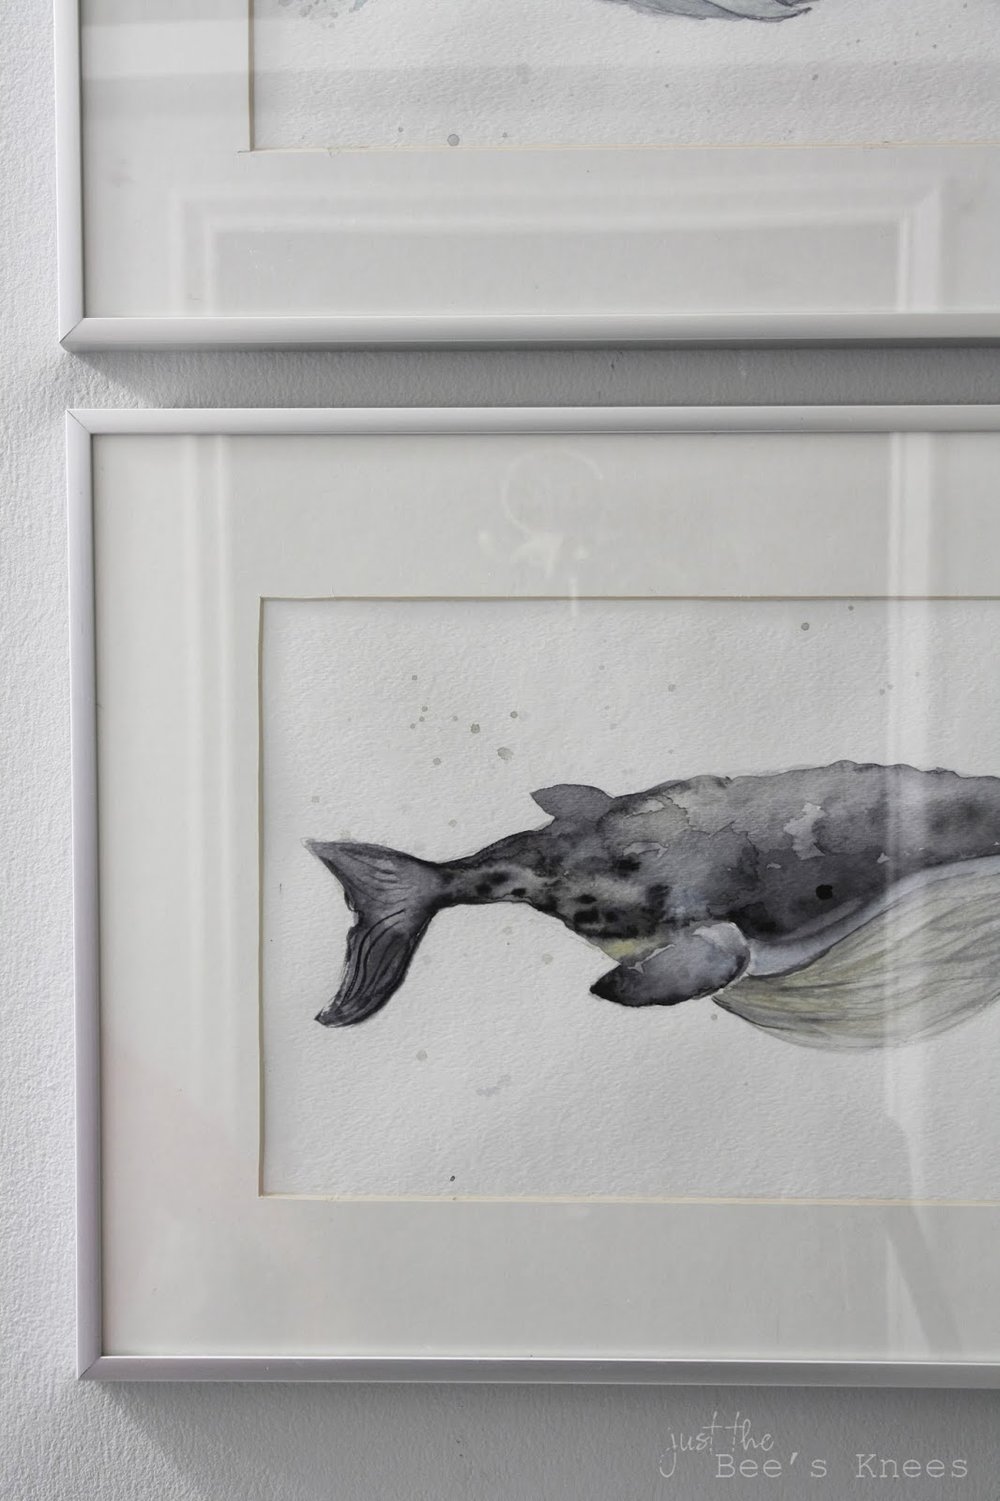
I'm thrilled with how they turned out and they look perfect hung in these chrome Stromby Frames from IKEA.
**Update!** After many requests, I am now offering art prints, stretched canvases & more for sale over at Society 6!
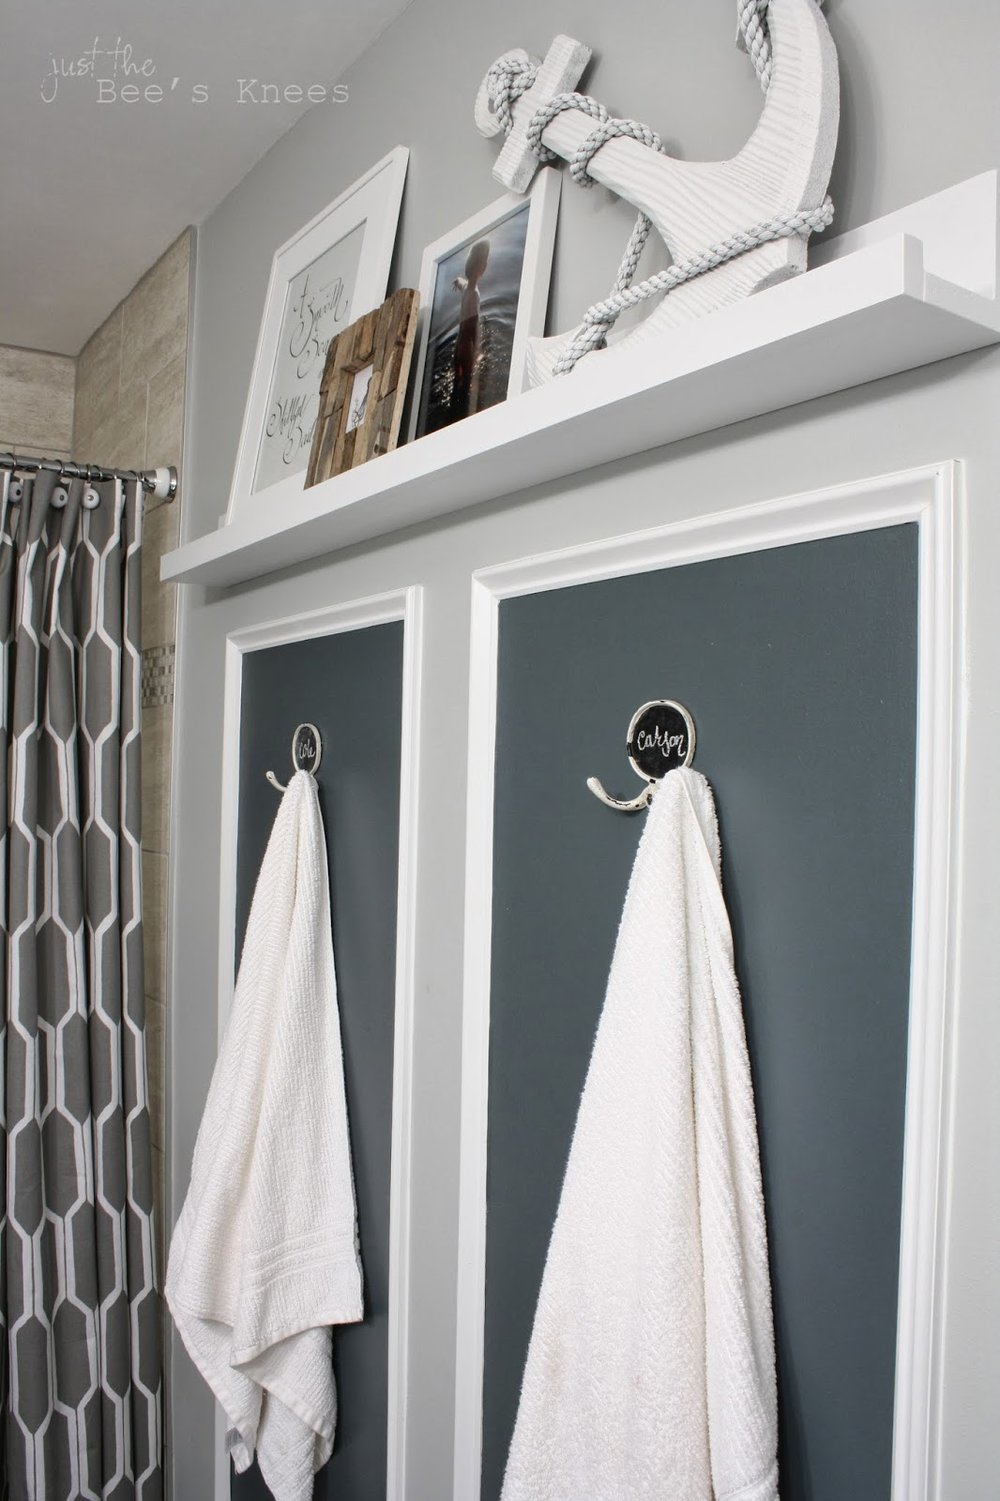
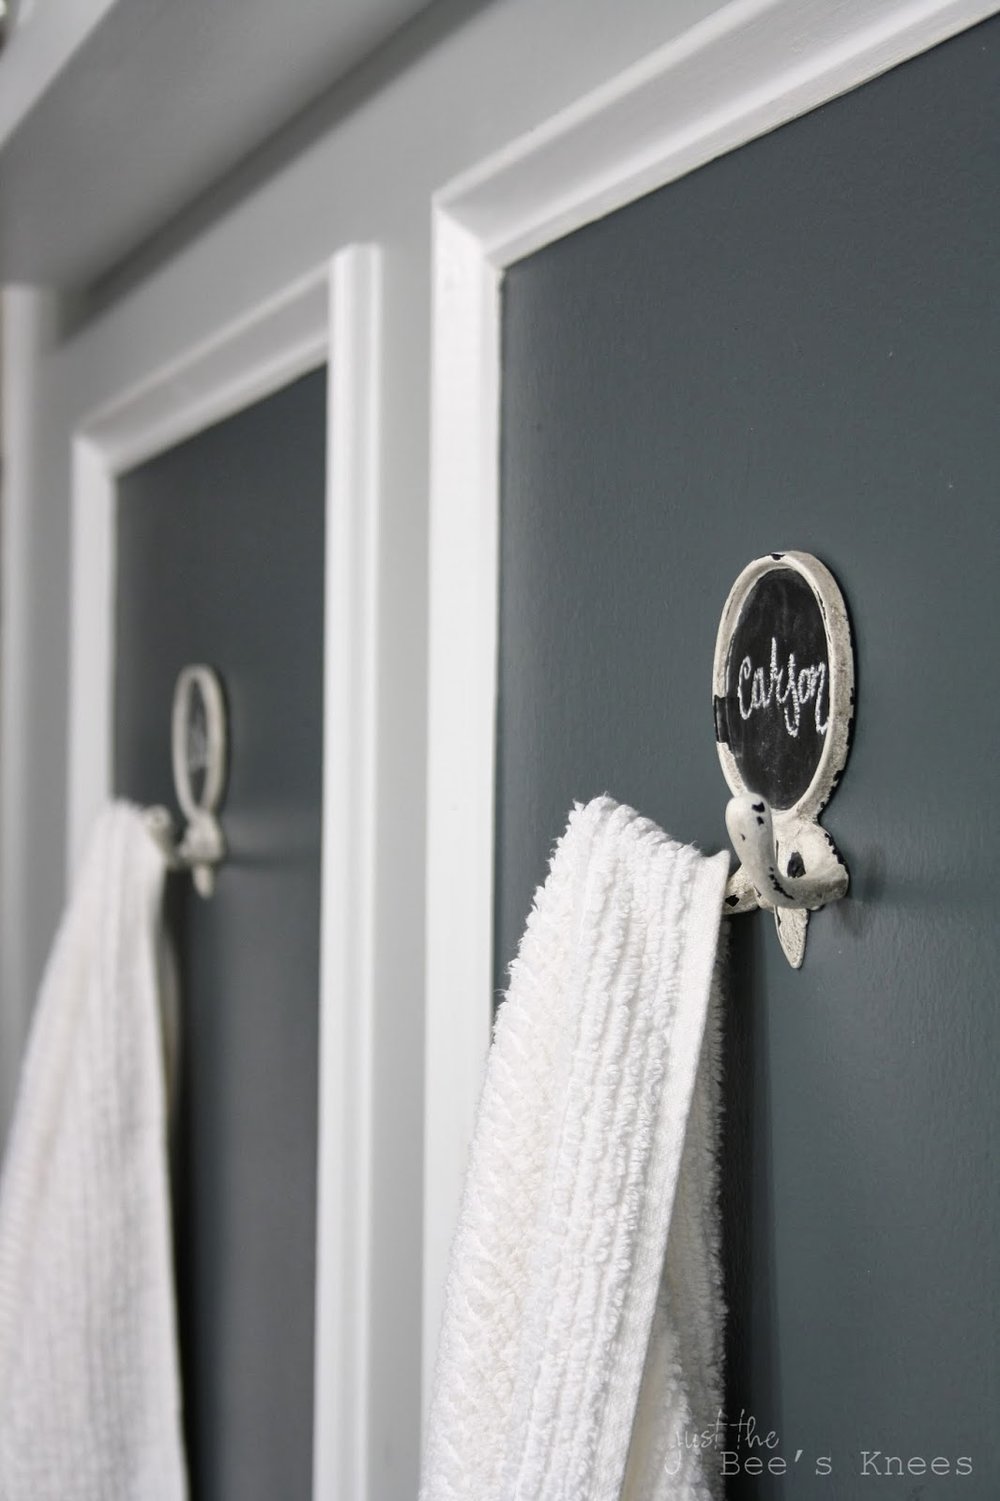
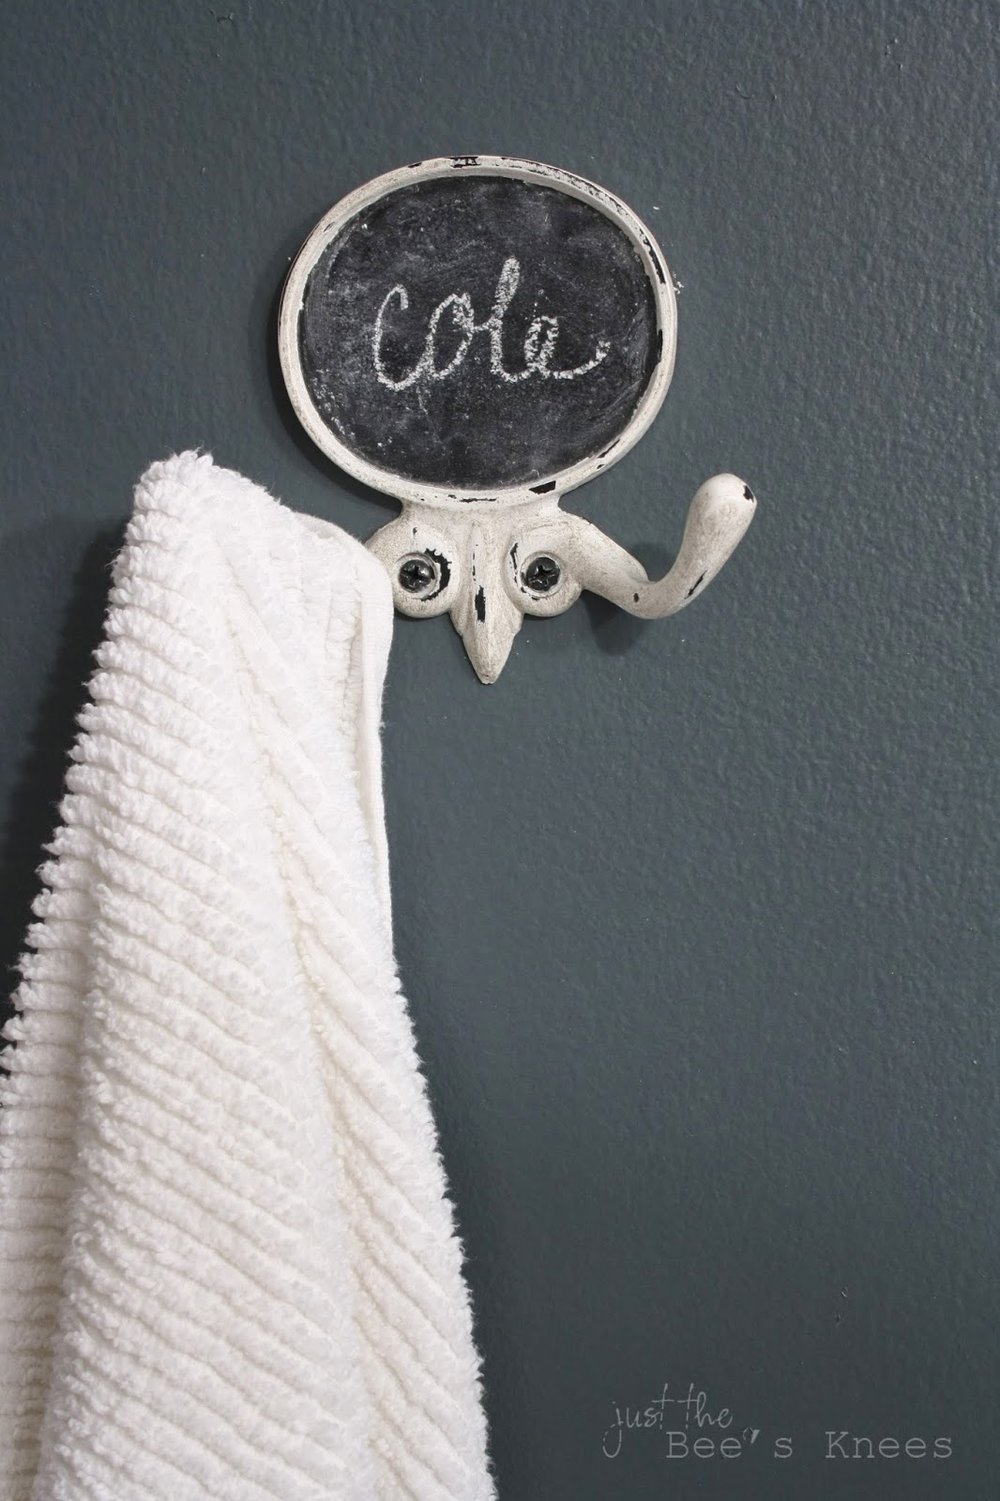
Instead of boring old towel bars, I wanted to use hooks to hang up their towels. I designed these decorative panels using wall trim and just painted the inside a dark moody blue. I fell in love with these chalkboard hooks from Anthropology, and love how the names can be changed for when we have guests over.
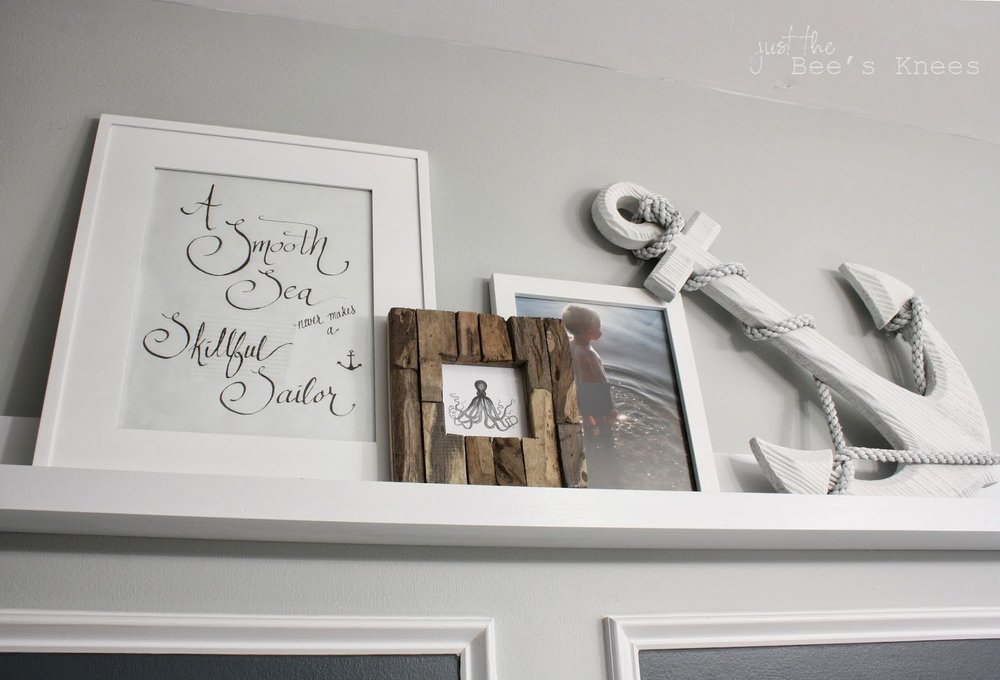
A DIY picture ledge sits above the panels and houses some nautical art. The calligraphy art was created by yours truly, and the cuttlefish is a free printable you can find here. I also added one of my favorite photos of Carson taken at the lake. He's nude obviously, so I did black out his little bum. (Not that I think any of you are perverts, but ya never know. And he might kill me when he grows up and discovers that his mom plastered pics of his butt all over the internet. :) I purchased the anchor from Hobby Lobby, but spray painted it a bright white to give it a more modern feel.
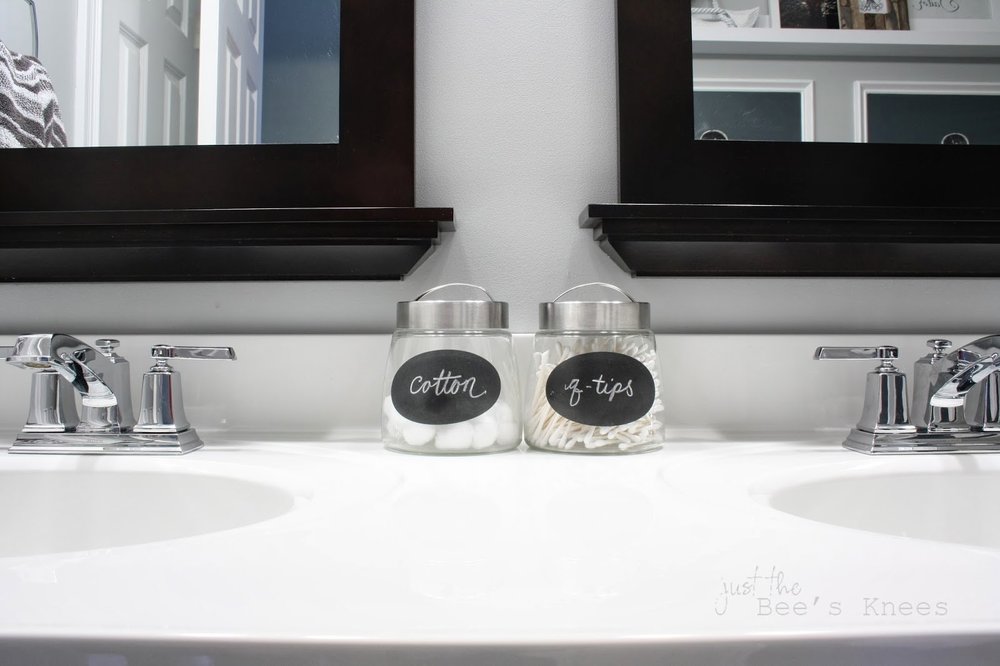
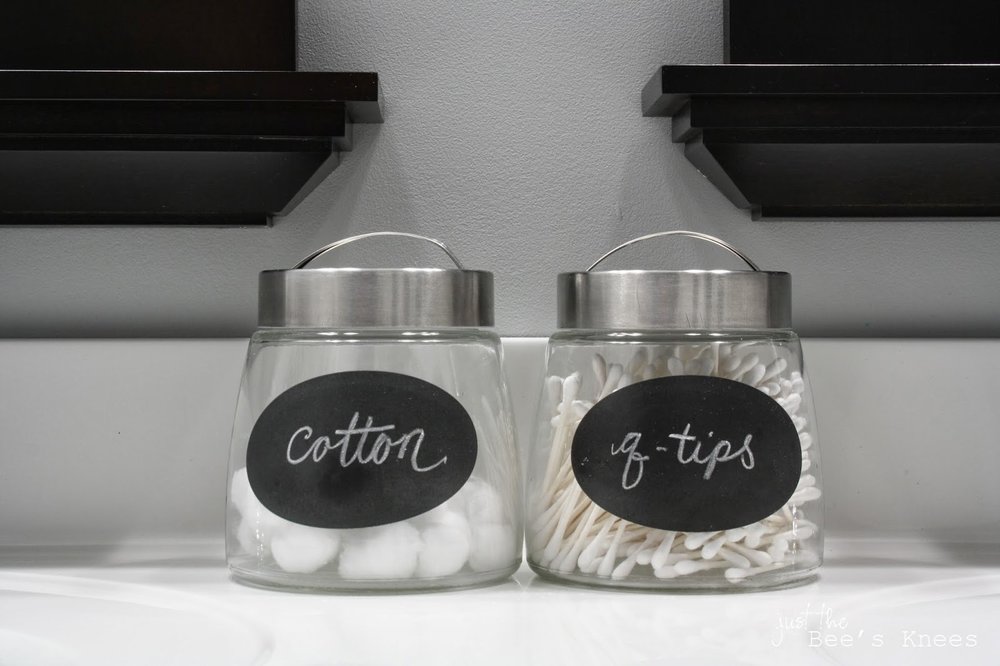
Many of the accessories I purchased are from Home Goods, including these adorable chalkboard jars that I found in the kitchen Isle. They were only $2.99 a piece and work perfectly for housing cotton balls and q-tips!
I couldn't be happier with the end result....and the boys are too:) I'm proud of my husband who did most of the work himself, except for the tiling. It saved us a ton of money in the long run.


Sources:
- Towel Ring: Moen Boardwalk , chrome
- Fauctes: Moen Boardwalk, Chrome
- Floor tile: Classico Ivory Matte 12x12 from the Tile Shop
- Wall Tile: Classic Ivory Matte, 10 x 16 from The Tile Shop
- Shower Faucet: Delta Two-In-One Shower Arm in Chrome
- Shower Curtain: Honeycomb Shower Curtain from West Elm
- Towel hooks: White Blackboard Hooks, Anthropology
- Basket, Bath Mat, Chalkboard Jars, Chevron Hand Towel: Home Goods
- Ceramic Octopus: One Kings Lane
- Anchor: Hobby Lobby (spray painted white)
- DIY Picture Ledge plans from Anna White
- Picture Frames: Stromby Frames from IKEA.
- Whale Prints: Society 6
- Paint: Main color: Sherwin Willlimas 7657 Tinsmith Accent Color: Sherwin Williams 6236 Grays Harbor
DISCLOSURE:
This post may contain affiliate links. I will only use affiliate links on products I love and personally recommend as I want to pass on my recommendations to you. By clicking through these links, there will be no charge to you, but any purchases you make may result in a small commission for me. I love creating and sharing my content with you, but as with anything in life, it takes time and money, so your support will be greatly appreciated!


