
Trendy Tuesday ~ Terrariums and a Tutorial!
What does Trendy Tuesday, a story about a girl, a boy, a fish and a little white lie have in common with a DIY succulent terrarium tutorial? Read on my friends and find out!
First up, Trendy Tuesday this week is all about....you guessed it....Terrariums! Terrariums have been around for a long, time, perfected and popularized by the Victorians. Back then, the terrariums were sculpted out of metal and glass and took on more of a mini-greenhouse look. Today the terrarium takes on a more modern organic form.


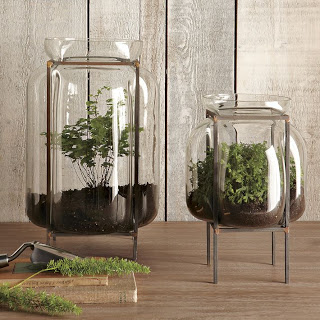

These gorgeous containers are all available from West Elm.

Glass Jar Terrariums from The Yellow Cape Cod.

Pretty Terrarium from Making It Lovely

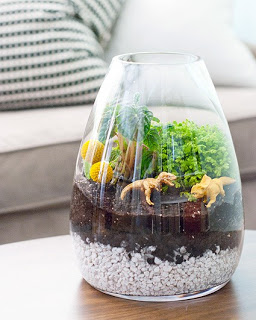
Crushing over this honeycomb terrarium from twig!
Are we totally in love with Terrariums and want to learn how to make one ourselves?! Time for the fun part. Let's learn how to make one of these trendy babies.

Now, I do not have the best track record with indoor plants. I can grow one heck of a garden tomato, but seem to kill of every plant I bring indoors! So I researched succulents, and supposedly they like neglect, which is perfect since neglecting plants seems to be my thing.
After rummaging through my closet for a container I could use, I came across this old fish bowl that was shoved in the back corner and knew it would be perfect!

A little dusty and in need of a fix up, but it has history that is too good not to share. As I giggled to myself I new that this fish bowl was destined to be re-incarnated into my terrarium. Time for the story.
It all started when this girl moved in with her future hubby and somehow managed to kill every single last one of his house plants. ( I don't know HOW it was all my fault when we now shared joint responsibility of said plants, but that's another argument for another day.) Anyways, feeling low and being labeled Miss Brown Thumb, I went shopping to cheer myself up and came across this cool bowl in Home Sense and right then and there decided to get a fish. What's more cheerful than brightly colored beta fish right?!?

Well the Mister just laughed at me and shook his head when I bought home my new fish (who I named Chuckie) and wondered aloud how I would ever keep alive my new pet when I couldn't even keep a plant alive. Hump! I'll show him, right?! Well about a week later while the mister was traveling, Chuckie died. And rather than admiting that I couldn't keep the fish alive, and risk being named Miss Fish killer,or something like that, I just did what a lot of women in my shoes would have done; I bought a new Chuckie that looked just like the old Chuckie.
When the mister came home, he looked at Chuckie #2, and looked, and looked, and said "Chuckie looks as if he's grown! And his colors are brighter! I hate to admit it, but when I left, I though for sure he was heading for the big toilet bowl in the sky." Well I couldn't tell him now, could I?! So I just kept my secret to myself (and all of my girlfriends) and Chuckie #2 lived a long healthy life to an unsuspecting husband. It wasn't until our wedding day he actually found out the truth about Chuckie when the girlfriends ratted me out.
So the fish bowl is a perfect fit for my first terrarium, and I hope that the plants live a longer life than the bowl's previous inhabitants. Enough blabbing. Onto the tutorial.

Supplies Needed:
- Container. (I cleaned my fish bowl up and spray painted the base a pretty gold)
- Rocks
- Activated carbon or charcoal. You can find this at pet stores in the aquarium department. It helps absorb excess moisture and keep the terrarium fresh.
- Succulents. I found Lowes had a great selection.
- Soil specifically for succulents. It is better suited at absorbing excess moisture.

And a few eager helpers too:) Notice that they are very much alive and healthy! And yes, I do feed them regularly, unlike plants and fish.
Step #1.
Add a layer of rocks to the bottom of the bowl.

Here's a tip: don't go out to the store and spend money on rocks. Just send two little boys into the backyard with a bucket and tell them to go on a rock hunt. It keeps them busy for at least an hour, and saves you money too! A quick wash and they are ready to go.

Step #2
Add a layer of the activated charcoal or carbon over the rocks.


Step #3
Add a thin layer of soil.

Step #4
Time to add the plants!


Break up the root balls a little before placing them in the Terrarium. It's a little tricky to position them with a tiny opening, but after you get them all in, just slowly pour in some dirt loosely around the plants. A small scoop or spoon helps!

Step #5
Use a small brush to remove any dirt that may have settled on the leaves, then water until the soil is wet.


Now find a sunny spot for your new Terrarium and enjoy!


Linking Up To:
Show us your planties! @ The Nesting Place
Tutorials & Tips @ Home Stories A to Z