My first go at creating a SPOOKY Halloween mantel!
Last week I talked about my severe shortage of Fall/Halloween decorations as a direct result of my knick-knack phobia. (Read all about that here) But for the sake of getting in the Halloween spirit for my kids, I decided to face my phobia head-on and spookify my place! (Without braking the bank of course!)
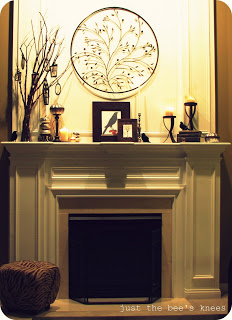
So I decided to tackle the mantel first, and I'm pretty darn proud to say that it looks fairly spooky with a bit of a vintage vibe going on! And by shopping at the dollar store as well as using things I already had around the house, I only spent a whopping 15 bucks!!
I love the look of the Pottery Barn Murcury Glass Pumpkins, but at $24 - $39 a piece, who wants to invest that much money into something you are only going to look at for a month tops? Not me! So I went over to the Dollar Tree and picked up some pumpkins, then spray painted them a shiny silver.
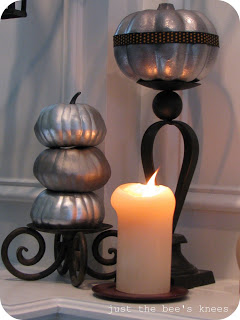
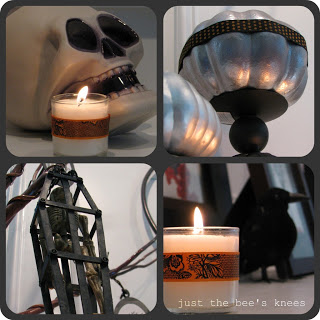
What do you think?! Not exactly a mirrored finish, but not bad for a buck! For the large pumpkin, I first sprayed it with Krylon Premium Original Chrome spray, which made it a fabulous shiny mirrored finish, but I wanted it to look a little aged, so I sprayed Modern Metals Black Chrome spray paint over it with short, quick bursts to add a little patina to the finish.
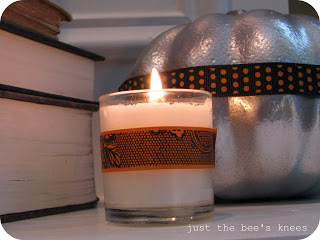
I added a little ribbon band around the middle of the pumpkin to hide the seam, and a little more ribbon around my votive candle.

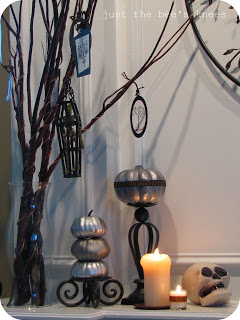
For the stacked pumpkins, I used Krylon Metallic Silver spray paint for the top and bottom ones, and Krylon Stainless Steel finish for the middle pumpkin. I took the stems off of the bottom two and just stacked them up! (The stems just popped off and I kept them just in case I wanted to put them back on for next year!)

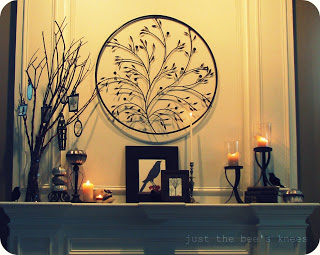
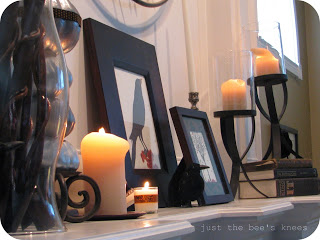
I saw some great FREE vintage Halloween printables over at Nest of Posies that I printed off and placed in some existing frames I had around the house.
I then printed off a few more smaller pictures and made some ornaments to hang from the branches that I placed in a glass hurricane. (I had purchased the branches earlier and had them displayed in my bedroom).
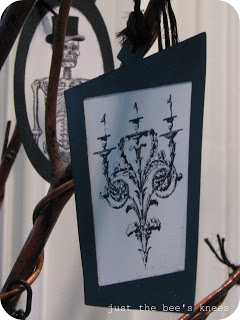
I found some more great FREE vintage printables over at The Graphics Fairy. (This site is awesome! She has a HUGE library of free printables for every occasion, so make sure you head on over and check it out!)
The black frames I cut out using my Cricut machine and just glued them over the pictures then hung them with black string.
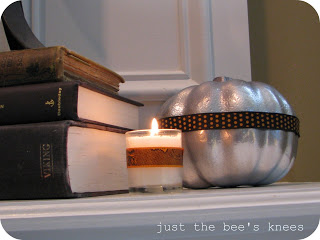
I love the look of vintage books. They give off a cool creepy look, so I removed the jackets from a few I had in my collection and stacked them up.Very Edgar Allen Poe, don'tcha think?!
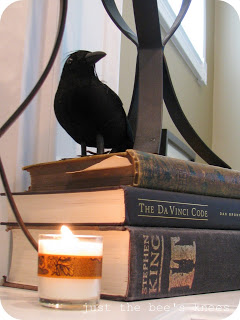
The crows were also another find from the Dollar Store, along with the skull and the hanging skeleton in the branches.(The kids really liked the caged skeleton! Should I be worried?!)
So there you have it! My first go at really making an effort to spookify my house without it looking too corny, but still a fun display that my kids also enjoy!
It just goes to show you that if you look around your house, you will probably find things that you can re-purpose to make really great seasonal displays. No need to go out and clear the shelves at the Hobby Lobby! With a little creativity and a few dollars, you can create a really unique display.
It just goes to show you that if you look around your house, you will probably find things that you can re-purpose to make really great seasonal displays. No need to go out and clear the shelves at the Hobby Lobby! With a little creativity and a few dollars, you can create a really unique display.
Next up I will tackle spookifying (and I promise this will be the LAST time I use this word!) my front door! So stay tuned!
Don't forget to join my Facebook Page or follow me on Twitter all month long as I share some great Halloween ideas and projects!
Until next time!
Sarah:)
I'm linking up this post with:
All Things Spooky party at All Things Thrifty
Whipperberry
Beneath My Heart
Seasonal Sundays at The Tablescaper
Funky Junk Interiors
All Things Spooky party at All Things Thrifty
Whipperberry
Beneath My Heart
Seasonal Sundays at The Tablescaper
Funky Junk Interiors