
DIY Faux Marble Lamp
Last year, I picked up a couple of lamps at a thrift store for $3 a piece. They were totally 90's hunter green and shiny brass, but I looked past the tackiness and decided to make them over for my guest bedroom/craft room. I had NO idea what to do with them.
I sprayed painted them white for starters. Then they sat on the beside tables like that for A YEAR. Last month I finally got sick of looking at them and decided I HAD to figure out a way to make them pretty. If you follow me on Facebook, you may remember me posting a few options that I was playing around with.

All of y'alls feed back was awesome and so much appreciated, but I just wasn't feeling either option, SO because when I'm on a creative kick, I will obsess about it until I figure it out, AND because these lamps were $3 and damn it if I wasn't going to figure out a way to use them, I scoured pinterest looking at lamps for inspiration.
Nothin. Nada. Zip.
A few days later I was shopping (or pretending to shop with my imaginary money) on my favorite site West Elm, I came across this beaut and had an Oprah Ah-Ha moment!
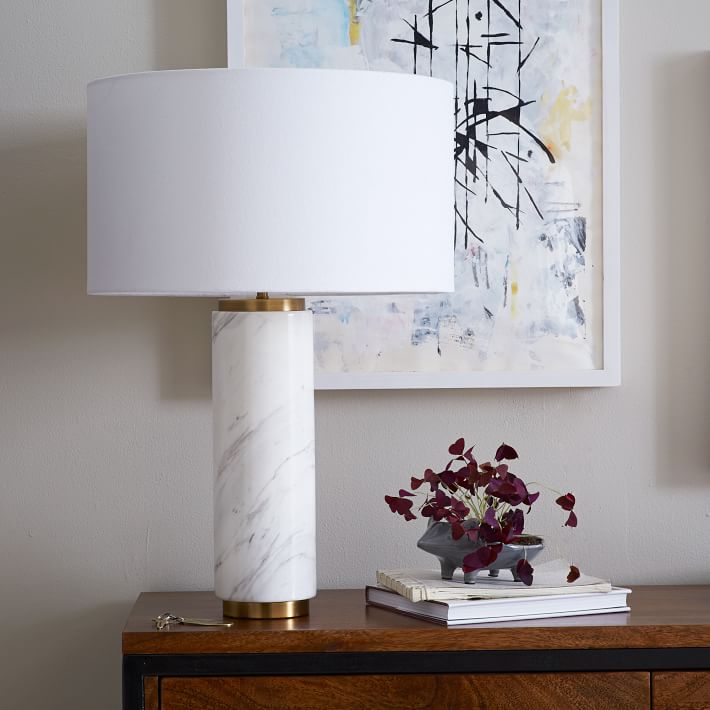
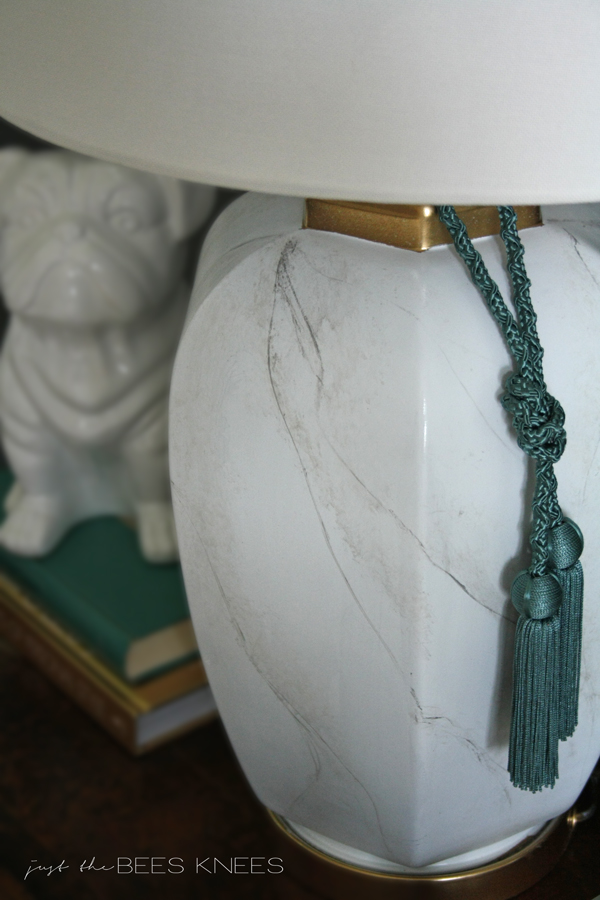
Instead of focusing on the shade, I decided to make over the base to look like faux marble! Ding ding!!
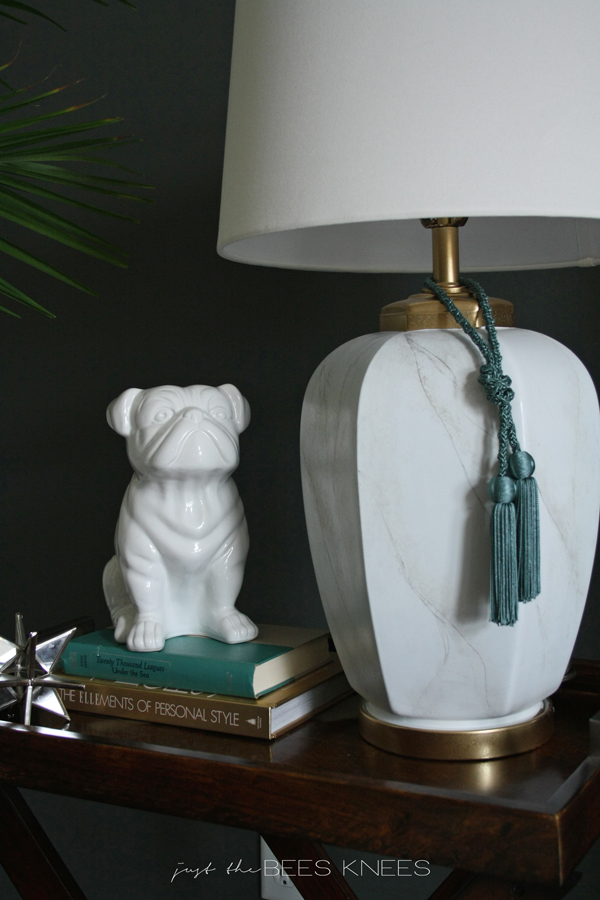
I'm totally digging it. And I know a lot of you didn't care much for my tassel, and thats OK, but I'm digging that too. Even Nate Berkus has a lamp out with a tassel this season. Bloop! (Sorry...couldn't resist channeling my inner Nene Leaks.)
To get a full appreciation for how far these lamps came, lets look at the before pic.
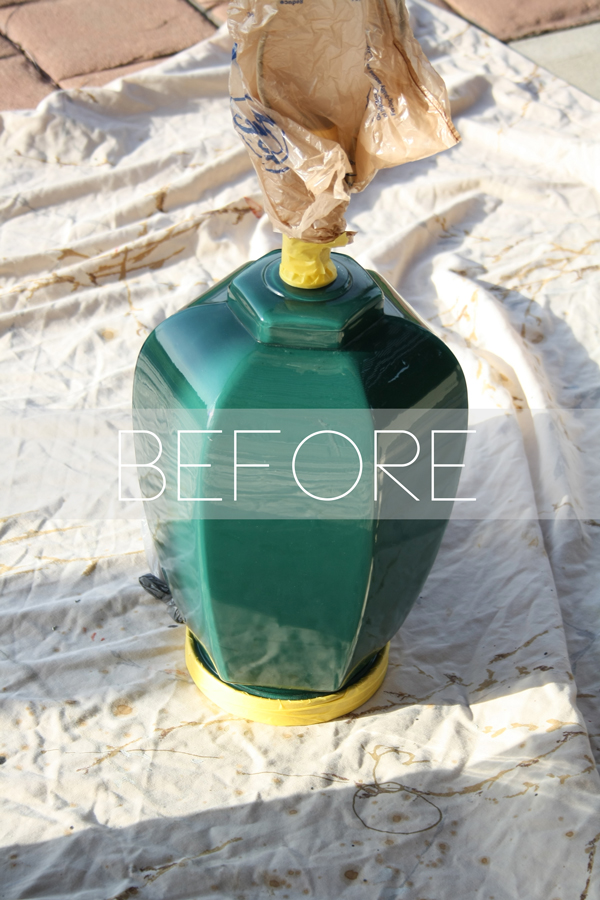
Told ya they were 90's! Now feast your eyes again on the after.....
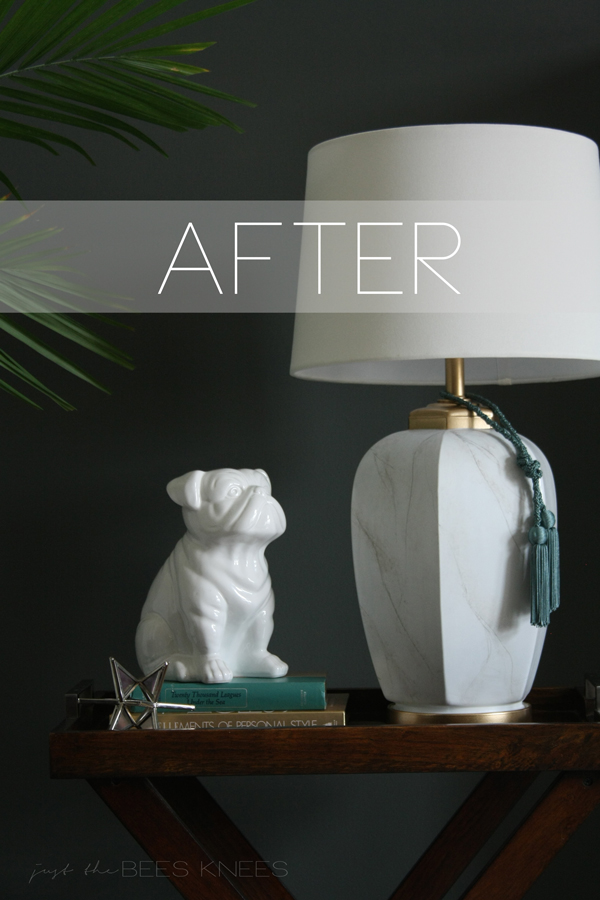
Not bad for $3 lamps if you ask me! To start the project, I first spray painted them with Rust-Oleum Painter's Touch Multi Purpose Spray Paint, Flat White . The key is to do many light coats for an even finish and no drips. Got that?!? Light coats. If you spray too much on at once, you will get drips, and believe me, you don't want that unless you want to be sanding and cursing till the cows come home. Oh yeah...and don't forget to tape off the parts of the lamp you don't want painted. As you can see in the before picture, plastic bags work perfectly to protect the sockets and cords.
Then, once the lamp was evenly painted and dry, I sealed it and created a gloss finish by spraying it with Rust Oleum Ultra Cover 2X Spray Paint, Clear Gloss . Again....light coats=no drips!
Lastly, I taped off and sprayed the top and bottom with gold spray paint.
Now comes the fun part....adding the marble texture!
I searched pinterest for tutorials, and saw a few different techniques, but ultimately used a combination off different ones and just played around with it until I achieved the desired result.
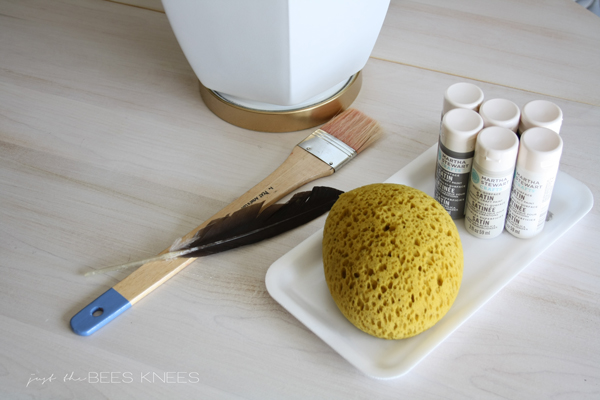
Supplies you will need:
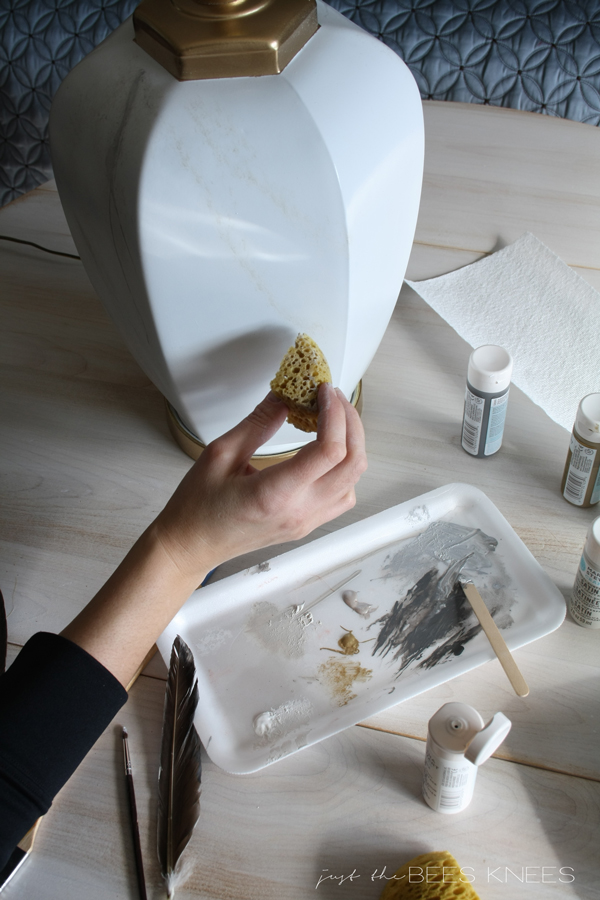
I started by squirting some different colors of paint on a tray. I stuck with grays and greige colors, but added a drop of gold in for some sparkle. Also, cut a small piece of your sponge off. Its way easier to work with that way. Wet your sponge so it is slightly damp, then lightly dip it in your base color (I used the greige) and dab off any excess. Then just start dabbing it in a veiny pattern. (I had my iPad open to the picture of the lamp I was trying to re-create for inspiration.)
Next, you add your veins in with the feathers. I just lightly dipped an edge of the feather into the gray paint (I alternated with both light and dark) and drag it along your sponged on veins, twisting and turning it as you go.
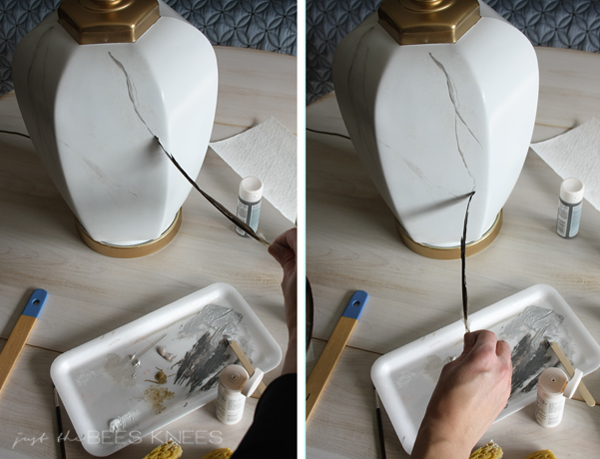
Before the paint dries, stipple and sweep over it with your dry brush to soften the lines some more.
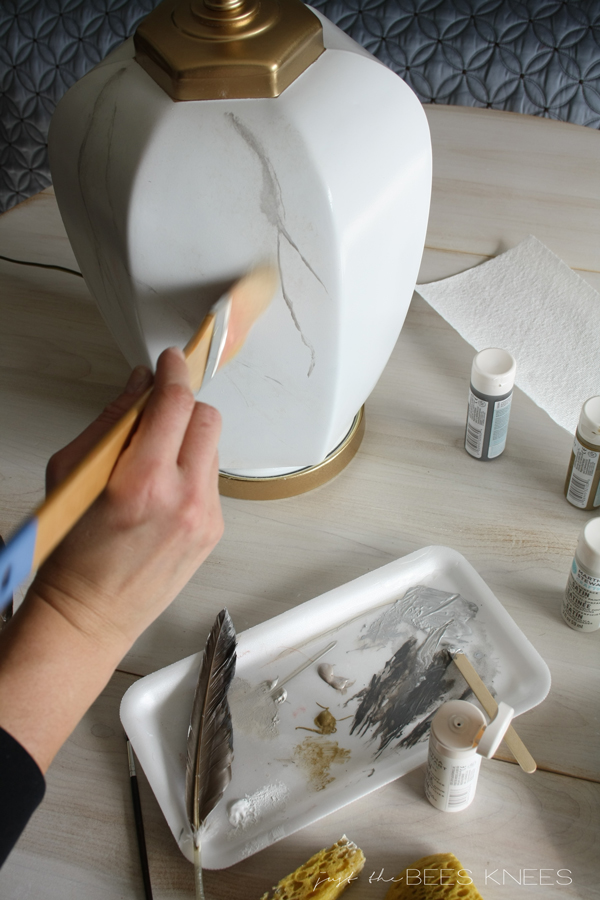
I wanted a bit of a softer look, so I sponged over the veins again using a mix of the greige and white.

(Sheesh! Remind me never to quit my day job to become a had model. Yikes.)
Repeat the veining/sponging/stippling process as much or as little as you want until your lamp is complete and you are ready to marvel in all its glory.
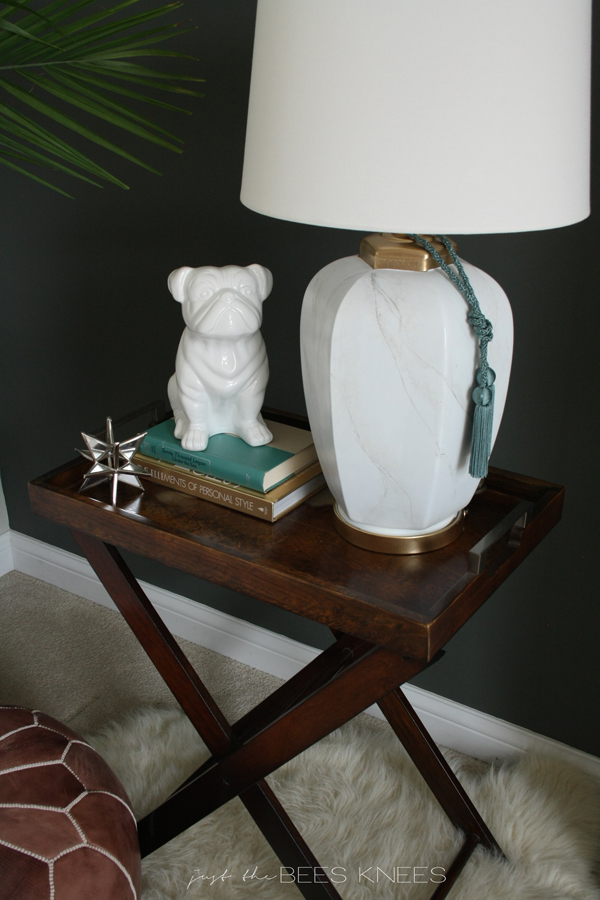
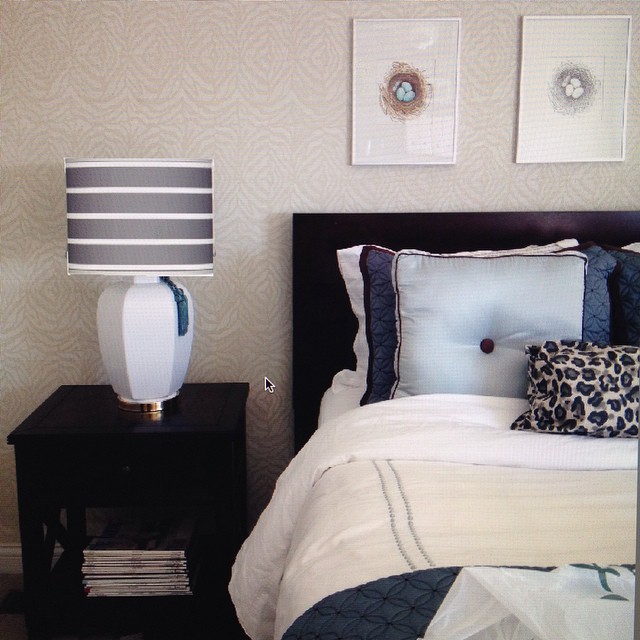
Now that I finally have lamps for my guest bedroom/craft room, maybe I will finally get around to showing it to you all put together?! While you are waiting in anticipation for this extremely overdue event, you can check out my progress and projects for this room below. xo!